Some people have asked me about my work process when I sculpt a figure. I took this opportunity to capture a few photos along the way as I was working on a figure sculpture, showing the various steps.
I will note at this point that this is the process I’ve developed on my own, over years of working on figurative sculpture, but I do not in any way claim that it’s the best process! My method of starting from a basic neutral/prone figure to create the basic proportions, moving to an approximation of a pose, and then successively refining the figure makes it almost impossible to build over an armature, which then severely limits the upward bound on the size of pieces I can construct. I’d probably do better building small “studies” this way, and then use this as a pattern to properly build up over a framework that will support the greater weight of a large piece, but that’s something I’m still learning.
In any event….
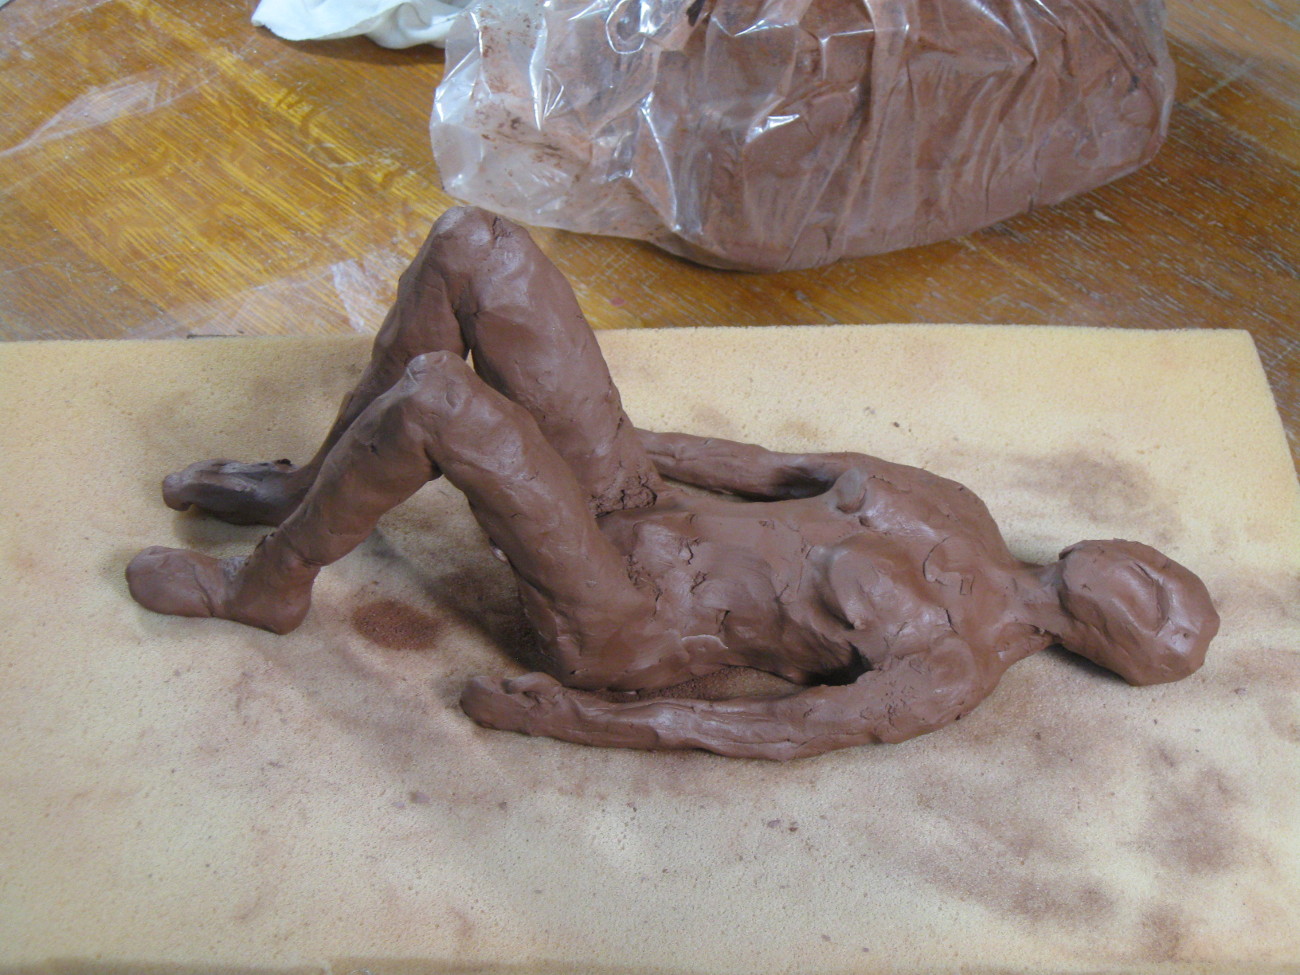
Blocking in the figure
The first step is to block in the basic proportions of the figure. The fresh clay is very moist at this point, meaning it will not hold up very much weight, so I can’t even sit the figure up. I often work on a foam pad, so I can flip the figure over without squishing things on the other side.
As I am working with the clay, the surface is already beginning to dry and stiffen, so it tends to open up and crack when I move something. Arms have a nasty tendency to fall off… 🙁 Different varieties of clay behave differently at this point, so I have tried to narrow in on a couple of types of clay, not only for their finished characteristics, such as color and finish, but also by how happily they behave in these early stages…
Basic proportions and body shape – neutral figure
Just enough detail on the face to envision the size relative to the body
Here, I have begun to refine the shape of the body and limbs. I have approximated the size of the hands and feet, though they do not have any details. I’ve added just enough detail in the face that I have a feeling for how big to make it to fit the rest of the body. Most proportions are based off the size of the head rather than the other way around. Head size can be used to determine neck-to-breast, breast-to-bellybutton, bellybutton-to-crotch, crotch to knee (1.5x head), knee to ankle (1.5x head). I also work to refine the width and thickness of the body, with the widest point at the hip joint, narrowing right under the rib cage, shoulders around two heads wide (more for a male), etc.
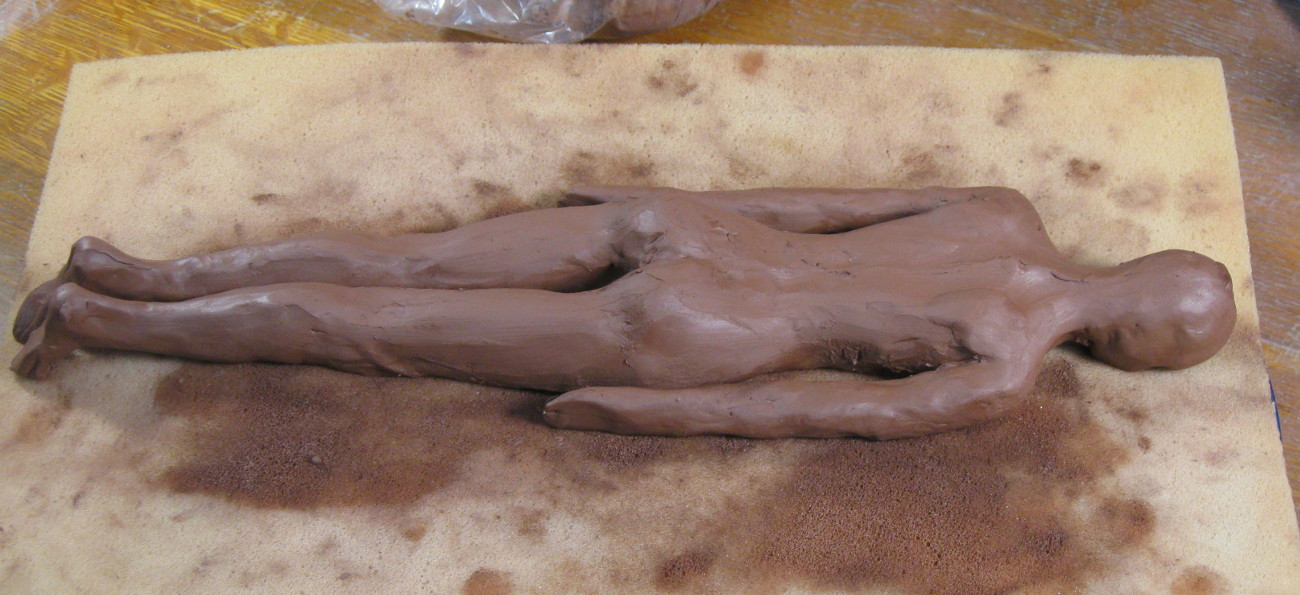
I will often take breaks here, leaving the piece loosely covered with a piece of plastic for a day or two so it can begin to dry out. It is much easier to position the piece once it has become “leather hard”, but it also becomes more difficult to make radical changes to things like the lengths of the legs or torso.
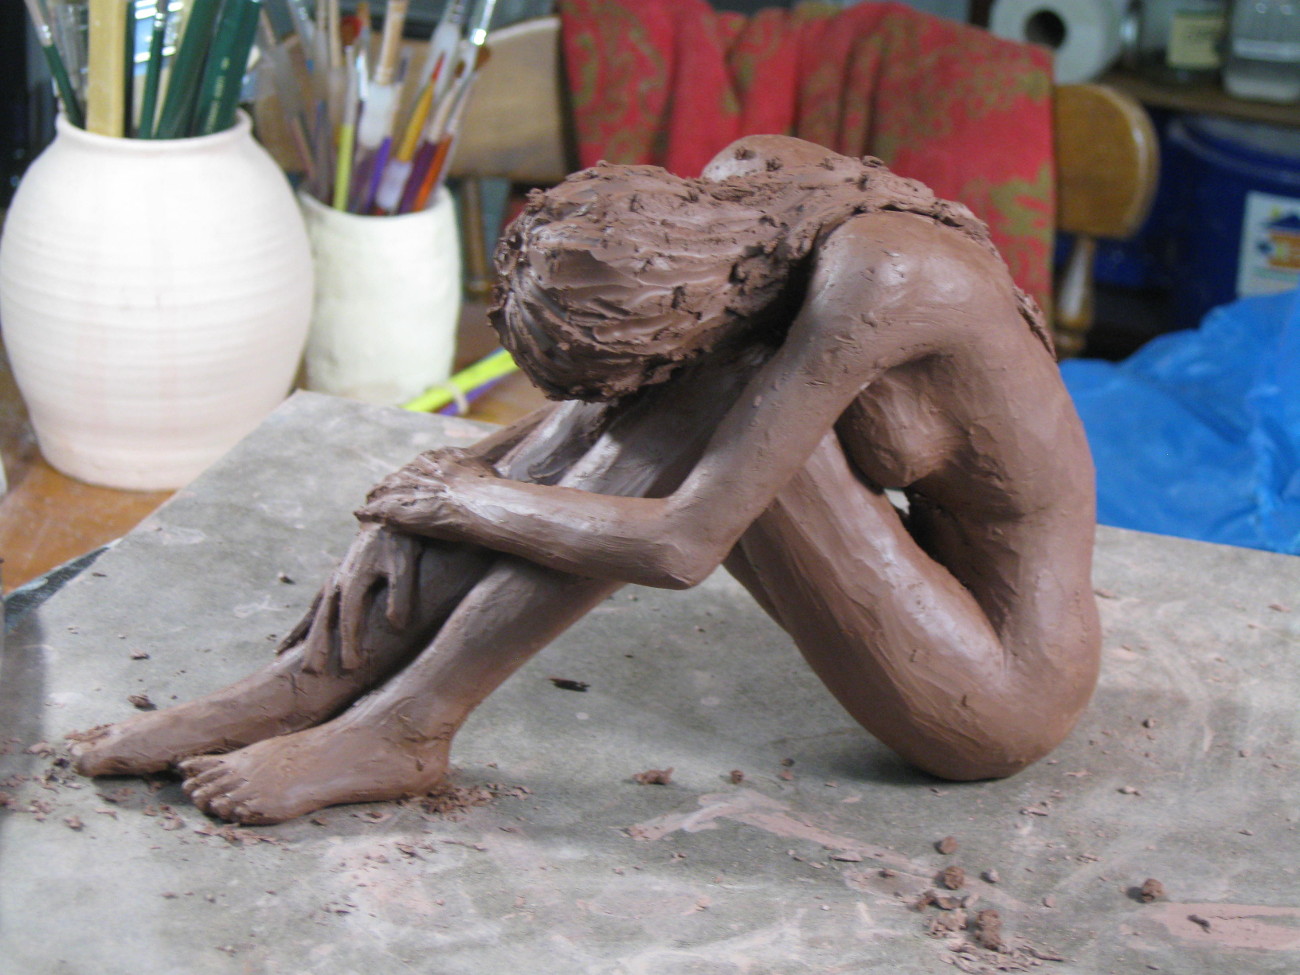
Creating the pose
Once the clay is stiff enough to hold its own weight, I need to start working the details of the pose, before the clay has dried so much that it resists bending. I may already have a clear idea how I want to pose the figure, but it is also at this point that I often find myself in a “dialogue” with the piece, exploring how it feels as I move things around. For this piece, I knew I wanted a forward leaning pose, with the hands relaxed around the ankles, but I didn’t know how I wanted the head and hair. You see here that the hands and feet are mostly “lumps”–generally the right size and in the right place, but no details. In many ways, this is similar to doing a pencil sketch — get the feature positioned and sized, and then worry about details.
This is where I need to get the gross anatomy correct. Based on my work in the early stages, the basic dimensions should be correct, but when you fold the body around imagined “joints”, you often expose inaccuracies and things that don’t feel right. In this piece, the thighs were too short compared to the torso, so her head was leaning down too much. I had to slightly compress the torso and stretch the thighs to make the leaning pose feel relaxed and unforced.
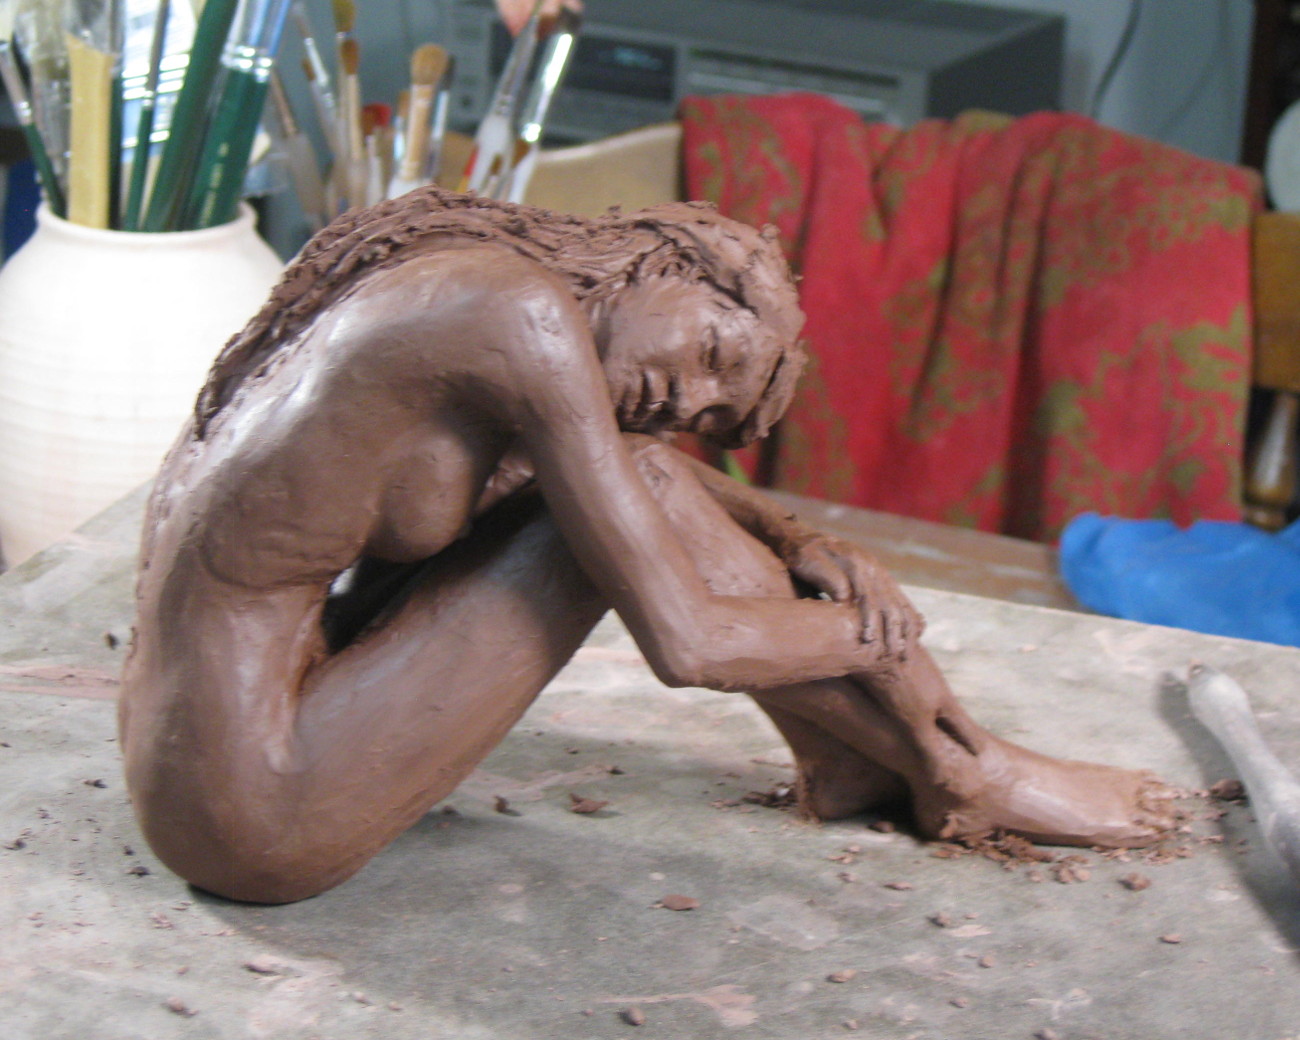
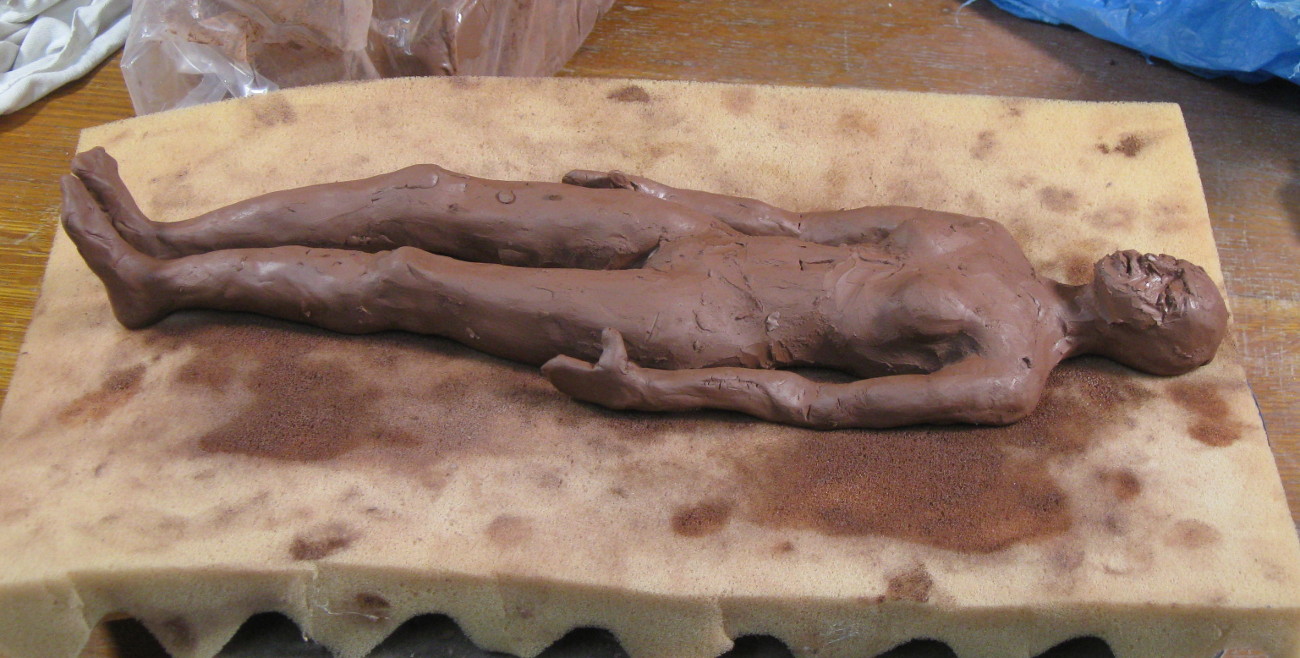
Refining body shape and details.
Fingers and toes!
Here, I have the basic shape done, the body proportions are dialed in, so I am refining surface texture and anatomical details. I tend to add in the hair near the end of the process, since it falls over the rest of the body, and is a lot more sensitive to handling (getting squished) if I have to turn the figure over. I will still make use of the foam pad, for example to set the figure on its back to work on the details of the feet.
This is where I do final tweaks to positions, such as in this case, moving one foot in front of the other rather than exactly side by side. In this figure, the waist and hips came out too narrow compared to the shoulders, so I added clay to built up the waist and bottom to be more in proportion.
One step I don’t show here (but would have been good if I’d thought to photograph it) was, in order to form the details of the hands and fingers, I broke both of her arms off a the shoulders in order to work on them, without the legs getting in the way. This allowed me to (a) make sure that the two arms were the same size, and (b) create the little details of the fingers. Re-attaching the arms to the body in such a way that I didn’t create a weakened “fracture plane” at the shoulder was tricky and involved lots of scoring and blending.
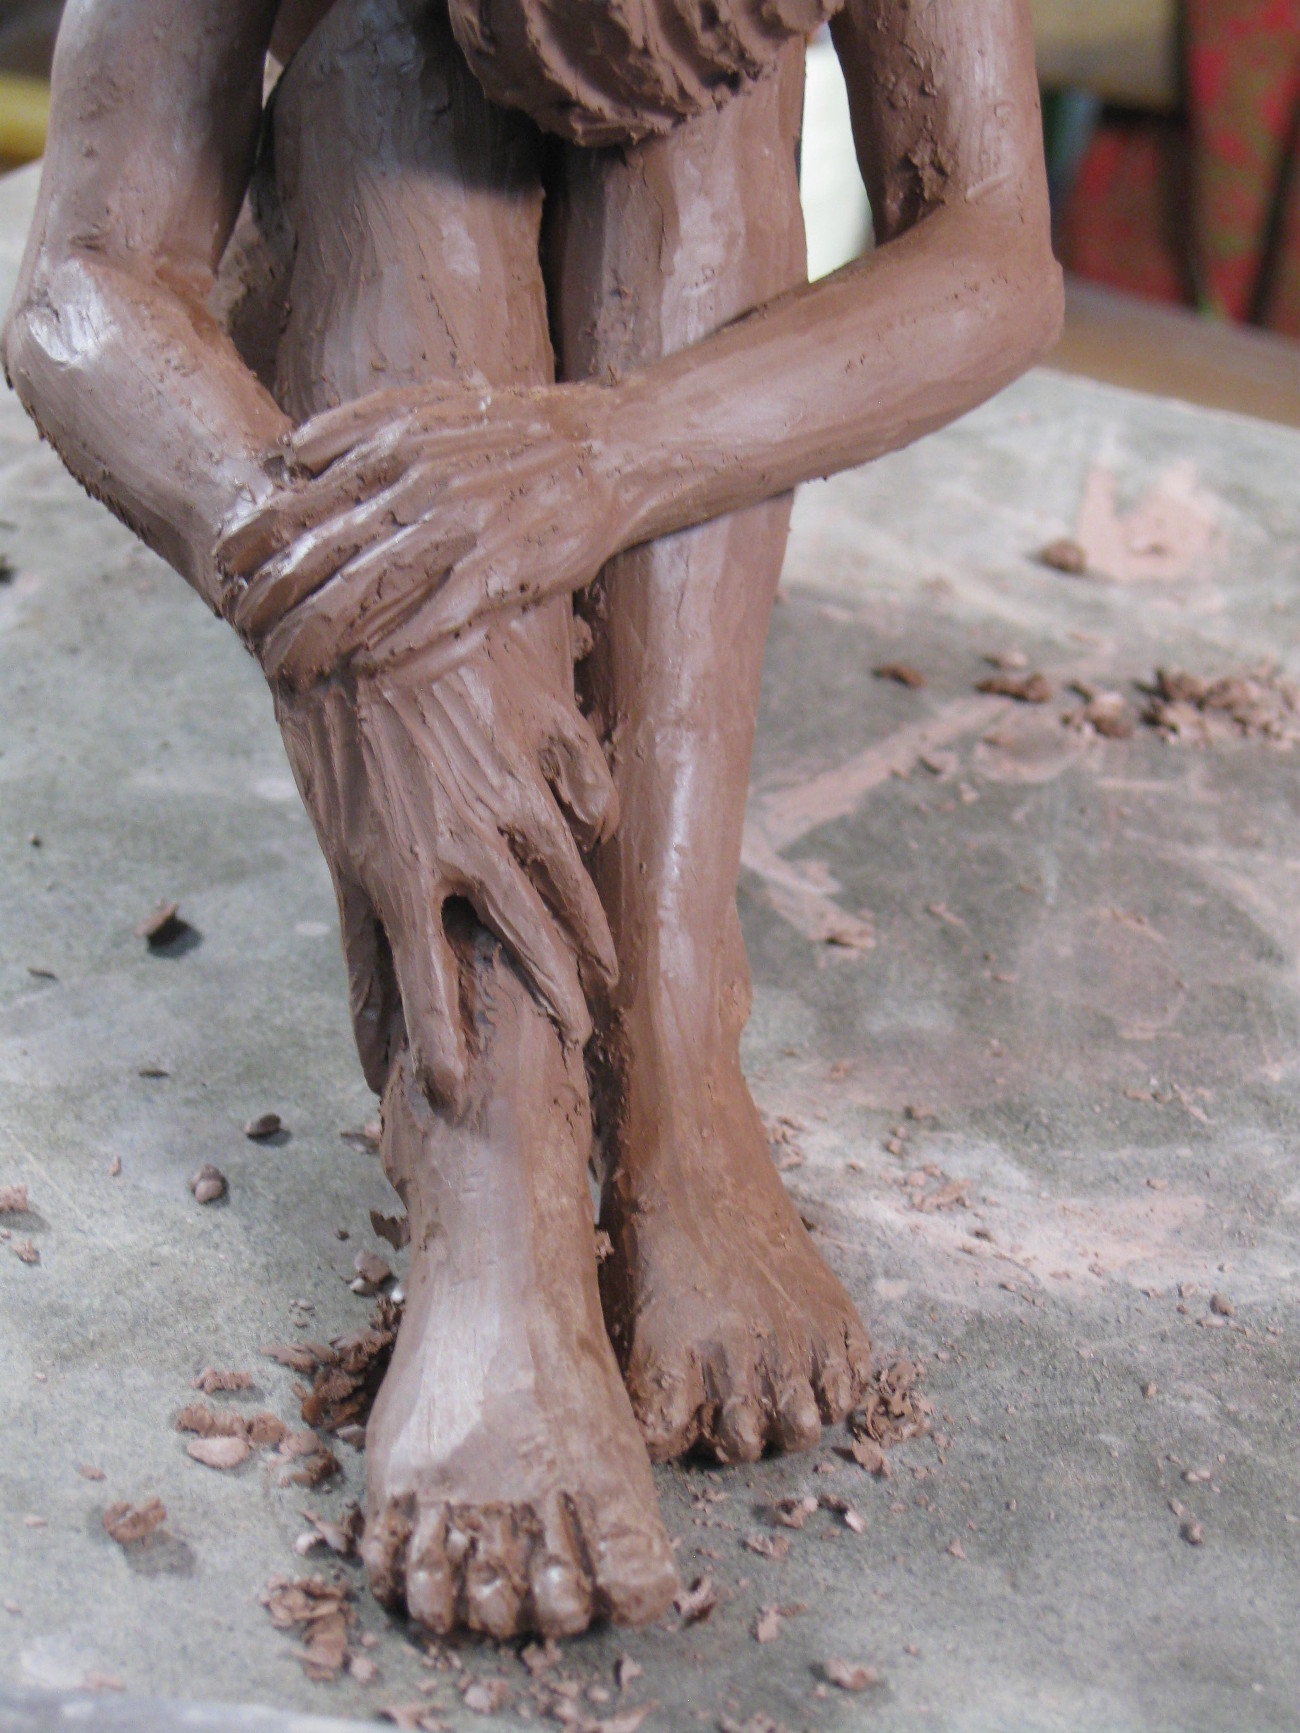
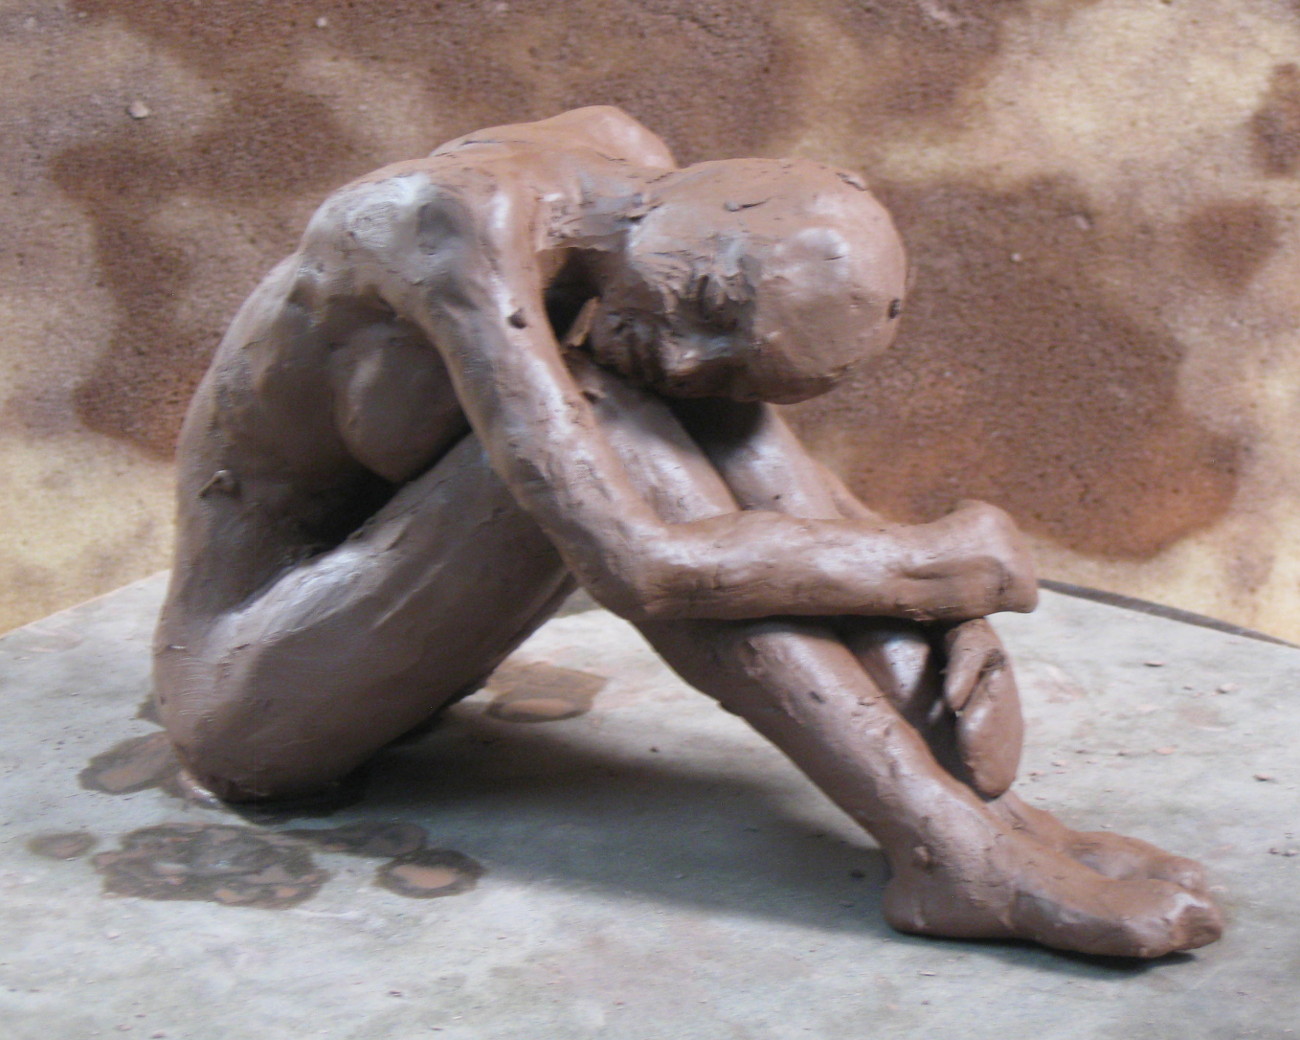
Detail work.
As I continue to refine the piece, I begin to concentrate more on surface finish, and making sure the piece “feels” right. As you can see in the detail here, I am working a lot on fingers and toes, not only getting the correct shape of the back of the hand, but the position of the individual fingers. In a piece like this, the hands communicate as much as, or more than the face. The clay is quite stiff at this point, so larger changes, as well as shaping the muscles in the arms, become more a matter of carving away the clay than of pushing it around or shaping it. It’s also an opportunity to slim down features such as arms, which weren’t strong enough to support themselves when the clay was softer.
This is also the point to work on some of the more subtle anatomical features, such as the slight folds over the ribs, the spine along her curved back, the shape of the elbow, the ankles, etc.. I can also work on the hair, which is always challenging to make it feel “soft”, as if it’s falling in place under the pull of gravity.

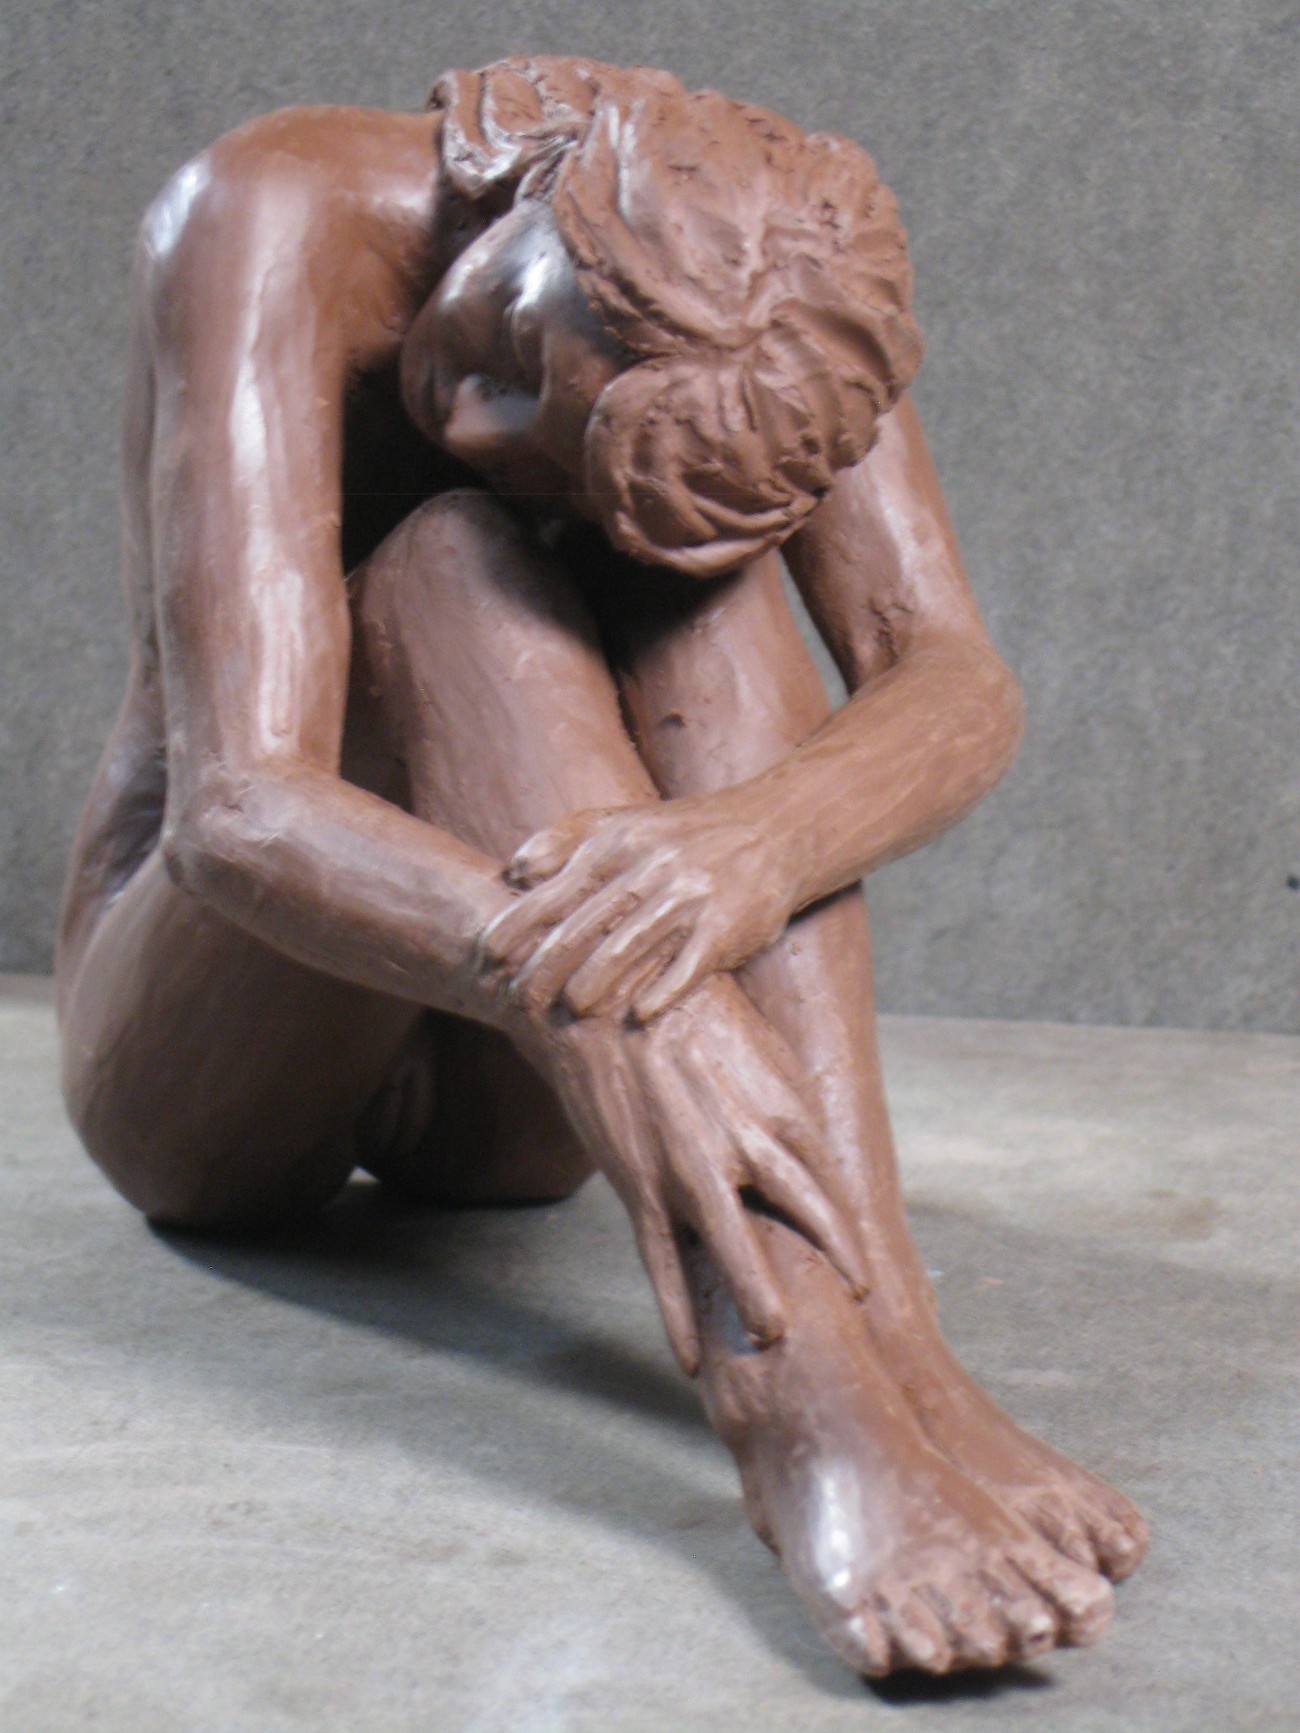
Surface finish and face
Final details largely involve the surface finish–lots of buffing with my fingernail or other tools–and refining the face. At this point, I often use a small, stiff paintbrush and water to even out small surface irregularities in the fingers and toes. This is the time to make sure that the ends of the fingers are pointed right and not crooked. For this sculpt, I wasn’t happy with how high the shoulders were, so I carved back a fair amount to round them out more, pulling them toward the feet.
This is also a time to constantly look at the piece from every possible angle, standing over the figure looking down, turning it around on the turntable, picking it up and turning it over in my hands (one thing that’s harder as the sculpt gets larger and heavier). I need to check every angle, from close up and from a distance. I find that photographing the piece often points out issues that I hadn’t noticed with plain eyes.
Tomorrow is a new day…
The piece here is basically finished, aside from the firing process. With most “pottery”, the bisque fire, glaze and final fire are a huge part of the work, but for sculptures, I find that the less I do to color or “finish” the piece, the better. The final (cone6) fire matures the color, and in the case of this variety of clay, finishes it off with a light sheen, not unlike the surface you see here in the partly dried state. I usually try to photograph the piece at this stage, and it’s interesting to see how the photographic process can often expose subtle problems that I don’t notice when just looking at the piece.
The hardest part of this stage is knowing when to, “Back Away from the Sculpture…” 😉 My natural tendency it to endlessly fuss with the figure, trying to get everything just right. However, I have found that there is a subtle but difficult to define value in leaving a figure just a little bit raw, as in this figure.
Most of the pieces I work on follow this basic outline. Some take considerably longer than others, depending on a host of variables such as the size, surface finish, complexity of the pose, whether or not I’m in a hurry to get enough work to make it worth firing the kiln. Nothing magic here, unless it’s the quiet magic of the artistic process of turning an image in my head into a physical, tangible form for others to see.